A Table for Our Cabin Culture…
When we began to furnish our vacation cabin I wanted a large coffee table that would be a real workhorse but one that would look good too. There’s no room for pristine, fussy furnishings here…Cabin culture means your feet can go up and no one will cringe! A sweaty glass didn’t make it on to a coaster? No problem. Aside from the high durability criteria, I had only one other requirement. It had to be square because of the placement of the two sofas in the room. I spent way too much time searching for something online only the find the ‘rustic’ ones too country in feel and most of the others to ‘new’ looking for this little rustic cabin. So, you know where I’m going with this I’m sure…Time to make something myself.
I decided the best thing to start with was a piece that was inexpensive. This had the double benefit of being easy to let go if I painted it and didn’t like the effect and not having a piece that was too ‘precious’ to redesign to start with. So off to the antique stores and corner auctions I went in search of a table…
I picked up this simple pine table for $50 from a local shop… It wasn’t what I had in mind (I’m not a huge fan of pine furniture) but things like this rarely are. What it had going for it was a sturdy build, solid wood and a nice blank canvas on top.
It was scratched a bit but no real damage. The finish was thin, not a heavy varnish so all it needed was a good sanding with a medium then fine grade sandpaper. Simple.
After sanding the entire table and cleaning it with a damp rag I grabbed some latex paint that I had been using on the walls and dry brushed off-white and warm grey on the surface, leaving the outer border unpainted. I didn’t manage to take a photo frior to adding the art but you can see it in some of the images below.
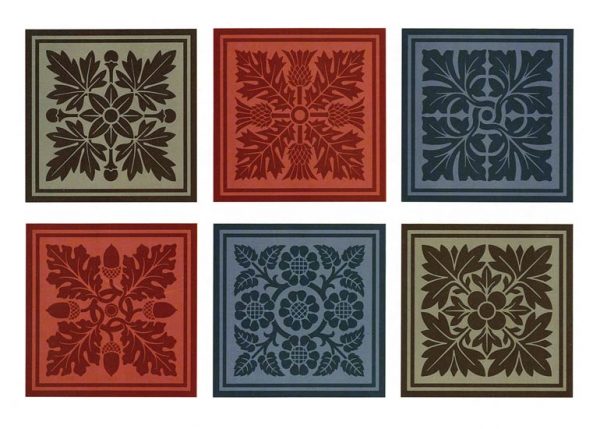
Next I needed art to add to the top. Nothing too fussy, nothing too directional. I didn’t want to get in a position where the table had to be placed a certain way for the graphics to be ‘up’. I found this in my digital art collection. I think it’s from Dover Publications. Dover has countless books and images helpful for projects like this.
Since my table was square, I chose four of the 6 patterns. I printed the squares in black and white and played with the size till I was happy that they fit the table well. Then I simply put a sheet of tracing paper under each design, taped them in place and traced over the designs.
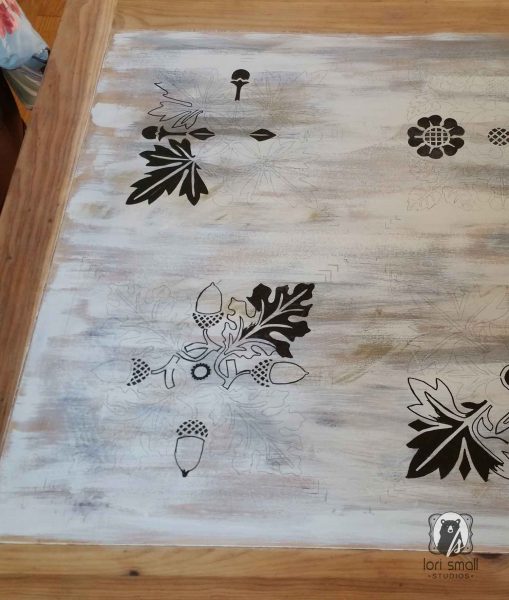
Here you can see the background paint, the faint tracings and the first of my painting in the patterns in black. I used a dry brush technique on the background so that I could leave unpainted areas that would grab a stain after the art was completed. This would give it a more rustic and cohesive feel, or at least I hoped it would! I used a black painter’s pen but I wasn’t certain that it had enough paint to do all 4 patterns so I worked on all 4 at the same time thinking that if I had to change paint to finish it up, it would at least look the same on all 4 patterns.
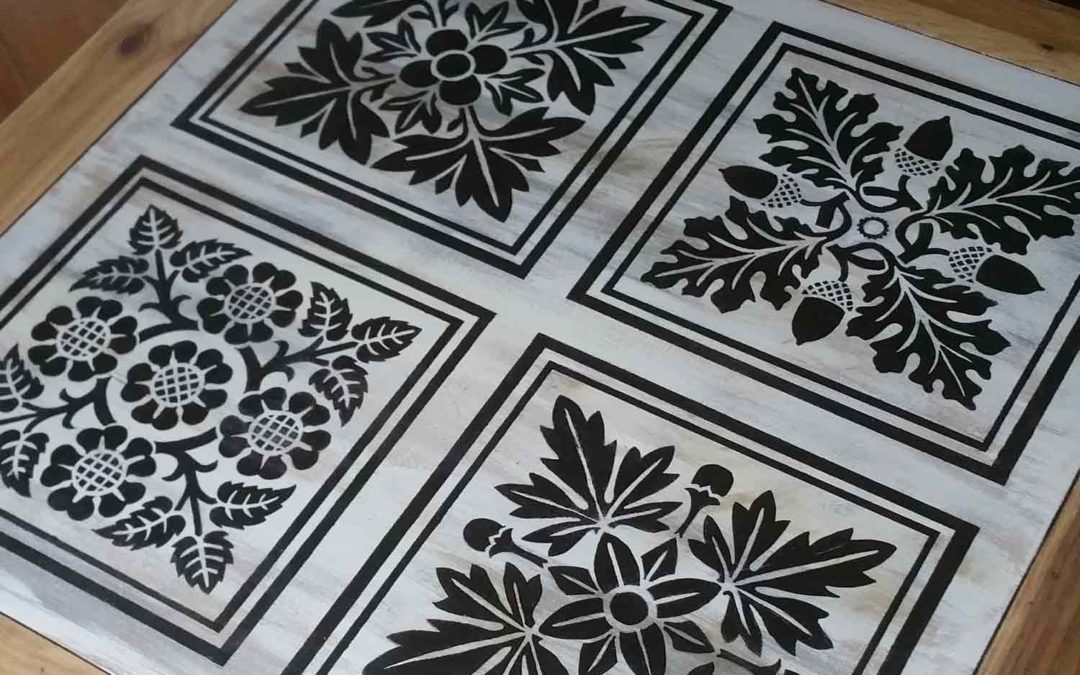
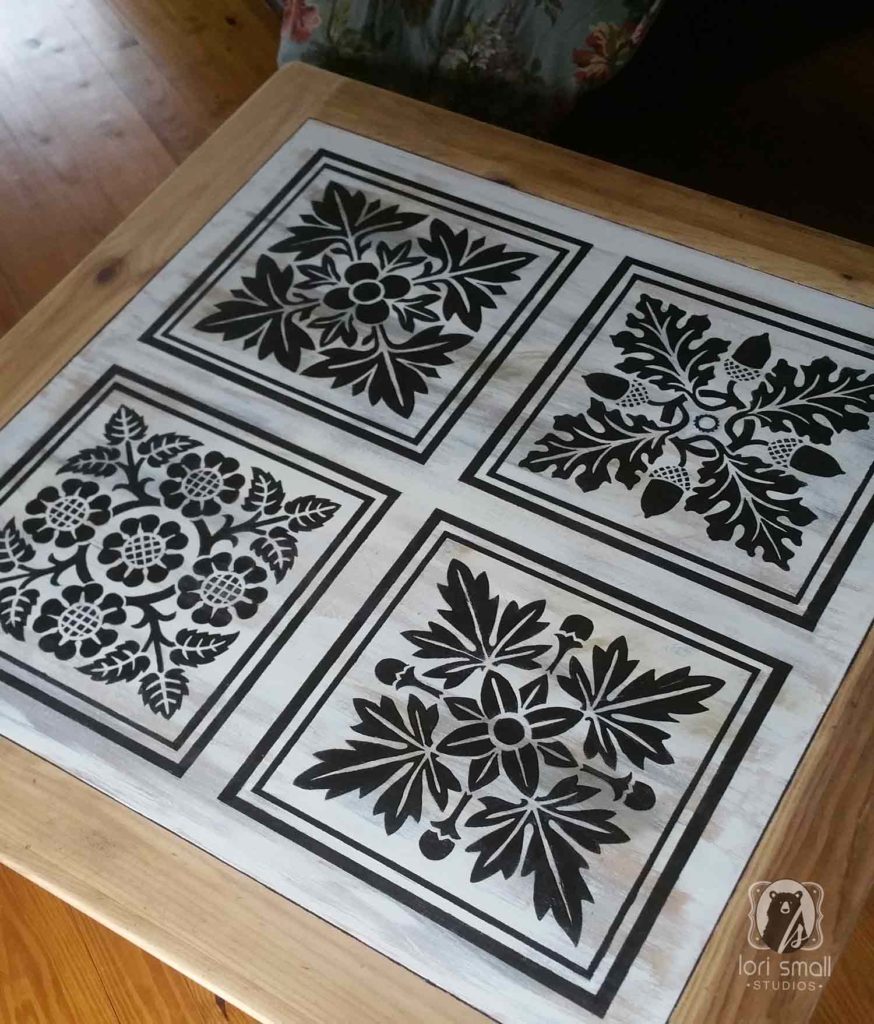
Here it is after the patterns are painted. The edge is still unfinished.
I painted the legs black and used the same dry brush effect on the side aprons. To finish up I stained the surface with a walnut stain and let that dry for a day.
The last step was a couple of polyurethane coats in a satin finish. All done! $50, some spare paint and a couple of days.
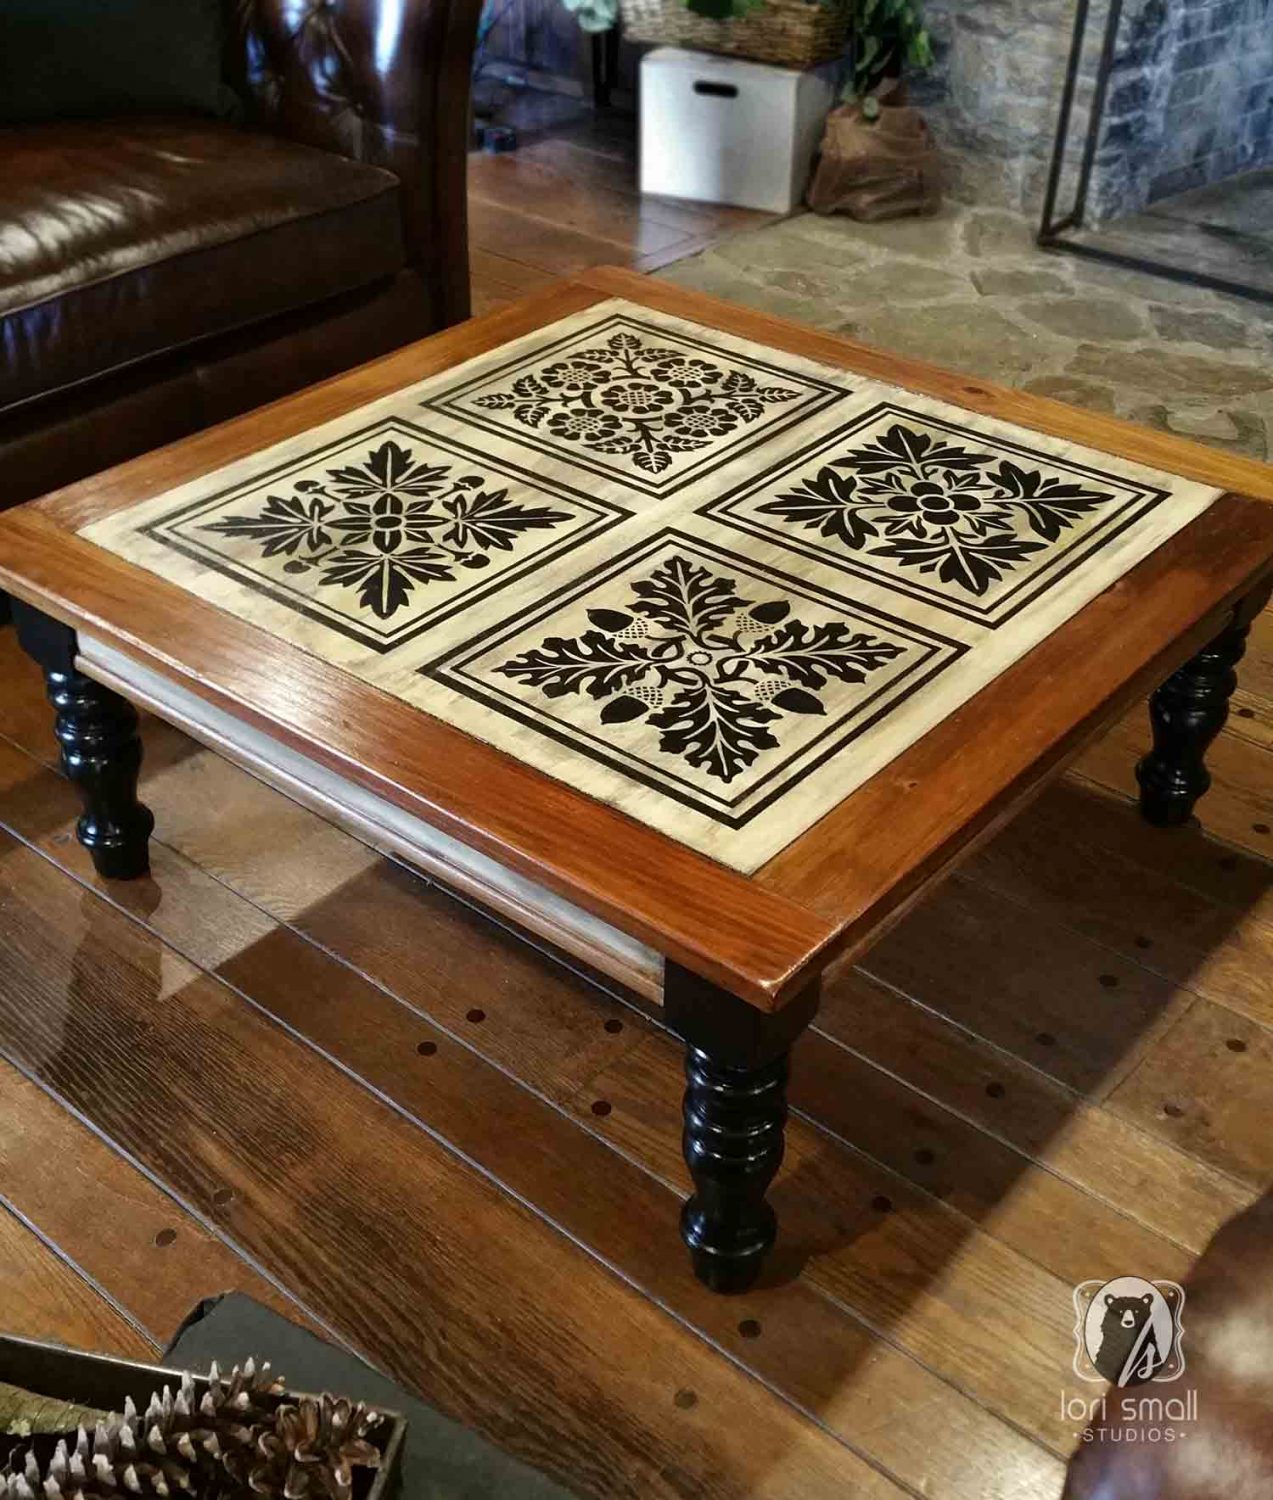
We’ve been using this guy for several years now and I still love it as much now as I did the day I finished it. The legs don’t look as polished in reality as they do in the photo above, which is a good thing. And the top has worked out well. The poly coating had allowed spills to wipe up easily and has kept the art looking the same as it did when it was just finished. Win, Win!
Let me know if you’ve tackled a similar project and your tips and tricks you learned along the way!